Accounts Payables by Report Date in QuickBooks Online
This article addresses the benefits of and how to create an Accounts Payable by Report Date in QuickBooks Online.
This report is one that you will need to customize the parameters from a typical Accounts Payable Summary report by simply choosing the “Report Date” option in lieu of the “Current” date option.
Most of the times, you probably will only be interested in understanding what your Payables are as of the current date (today). However, for whatever reasons, you also may be interested in knowing what your payables were as of a certain preceding date (such as one month ago). This can be useful for two main reasons:
- Cash Flow Strategy
- Balance Sheet Reporting
So, to get started here, here are some screenshots to help illustrate how to process this report and what the resulting effects were. In all of these screenshots, pay attention to two main parameters:
- Report period = Custom
- Aging method = Report date
Please Note: You should also notice that, at the very bottom of all of these AP report screenshots, the official date that all of these reports were processed were all on the same date of December 25th. So, we are really just looking back in time here via these AP reports.
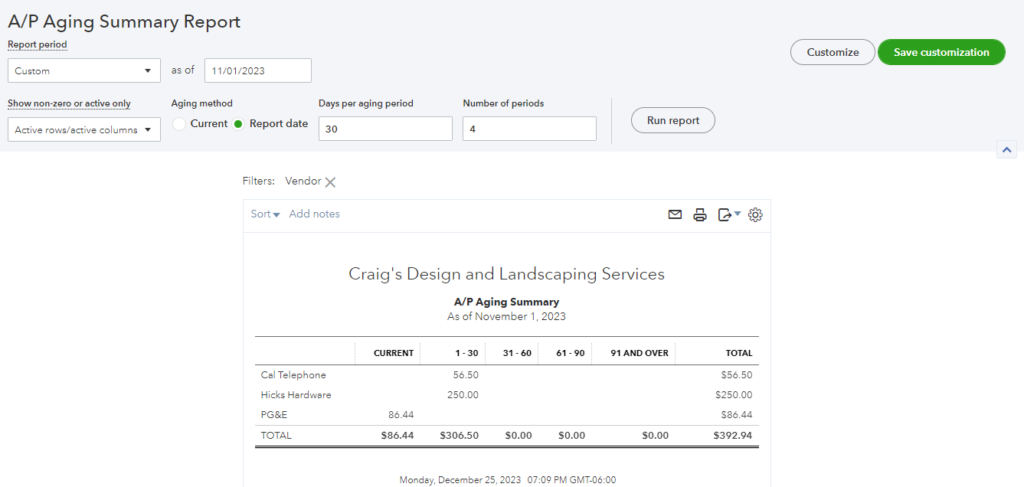
So, in this first screenshot, notice that these were the outstanding Payables as of November 1st:
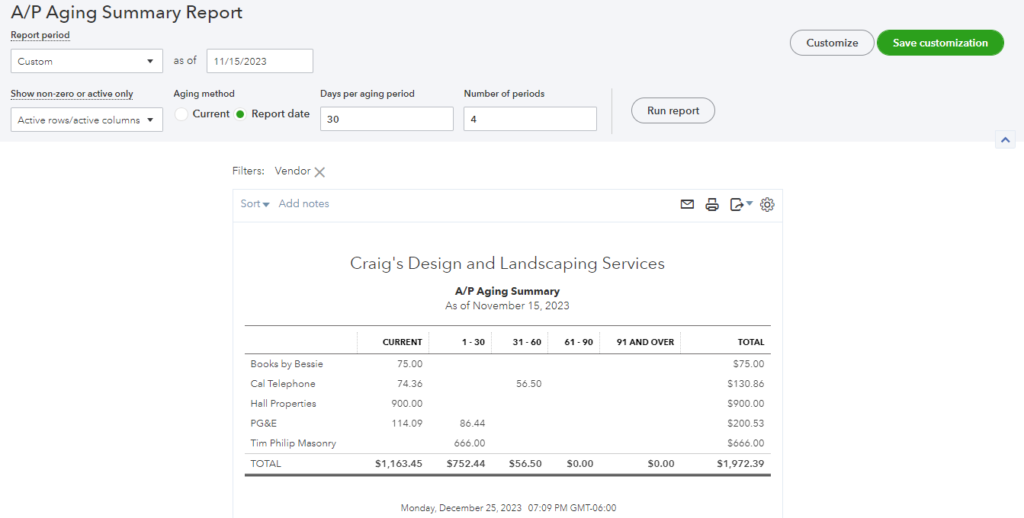
In this second screenshot (for the same company), notice that these were the outstanding Payables as of November 15th:
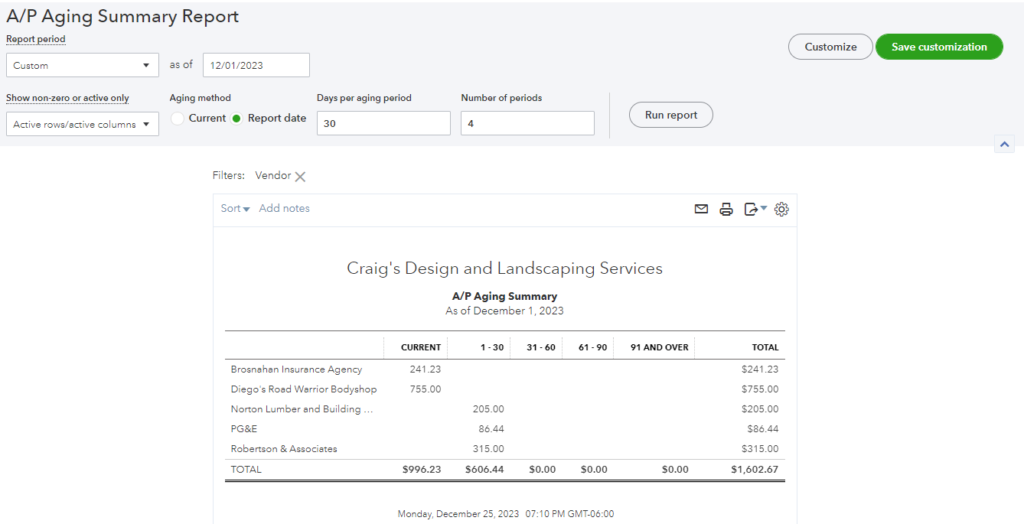
Finally, in this third screenshot (again, for the same company) notice that these were the outstanding Payables as of December 1st.
Note: AccuraBooks is a bookkeeping firm only, so please consult with your C.P.A. for verification and clarification about the contents of this article.